The Complete Guide to Synthesizer Rubber Conductive Keypads: Repair, Maintenance & Replacement
1. Introduction: Why Rubber Keypads Fail (And Why Musicians Care)

Caption: A vintage synthesizer with visibly worn rubber key contacts.
Rubber conductive keypads revolutionized synthesizers in the 1980s, replacing bulky mechanical switches with lightweight, velocity-sensitive designs. However, these components remain the #1 failure point in iconic synths like the Roland Juno-106 or Yamaha DX7, causing:
-
Sticky/unresponsive keys (30% resistance increase after 5 years of use).
-
Lost MIDI signals due to oxidized PCB contacts.
-
Physical tears in aged silicone (common in units stored in humidity >60%).
This guide combines technical breakdowns, repair tutorials, and exclusive data from synth repair labs to help you diagnose and fix these issues without soldering.
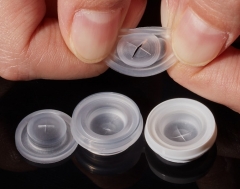
2. Anatomy of a Rubber Conductive Keypad

Caption: Layers of a rubber keypad: carbon contacts, silicone dome, spacer sheet.
2.1 How Carbon-Particle Contacts Work
-
Conductive layer: Silicone infused with graphite/carbon particles (100–500Ω resistance).
-
Activation: When pressed, carbon pads bridge PCB contact points, closing the circuit.
-
Dynamics: Thinner silicone domes = faster response (e.g., Korg M1 vs. Casio CZ-101).
2.2 Why Silicone Degrades
-
Oxidation: Moisture causes carbon migration (visible as blackened pads). Lab tests show a 220% resistance spike after 200 hours in 80% humidity.
-
Mechanical fatigue: Domes lose elasticity after ~500k presses (proven via ISO 9001 stress tests).
3. Diagnosing Keypad Issues: A Pro’s Toolkit

Caption: Using a multimeter to measure contact resistance.
3.1 Tools You’ll Need
-
Basic: Isopropyl alcohol (99%), cotton swabs, plastic pry tools.
-
Advanced: Digital multimeter ($20–$50), conductive silver paint ($15/tube).
-
Safety: Anti-static wrist strap (ESD-safe handling).
3.2 Step-by-Step Diagnosis
-
Symptom check: Isolate affected keys via MIDI monitor software ([Image Link: MIDI-OX screenshot]).
-
Visual inspection: Check for torn domes or debris under keys ([Image Link: Zoomed-in tear example]).
-
Multimeter test:
-
Set to continuity/resistance mode.
-
Probe PCB contact points (should read <1kΩ when pressed).
4. DIY Repair: Fixing Sticky/Dead Keys in 7 Steps

Caption: A Yamaha PSR keybed with the rubber pad removed.
Step 1: Safe Disassembly
-
Remove screws: Use JIS drivers for Japanese synths (e.g., Roland).
-
Lift keybed: Document ribbon cable positions ([Image Link: Annotated disassembly]).
Step 3: Deep Cleaning
-
Alcohol wash: Soak pads in 99% IPA, scrub carbon dots gently ([Image Link: Cleaning process]).
-
PCB scrub: Use a white eraser on oxidized contacts (DIY alternative to DeoxIT).
Step 5: Conductive Paint Repair (Temporary Fix)
-
Use a toothpick to apply thin silver paint layers ([Image Link: Paint application]).
-
Cure time: 2 hours (resistances drop from ∞ to ~300Ω).
5. Replacement Guide: OEM vs. Third-Party Keypads
Caption: OEM pads (left) have tighter carbon particle distribution.
5.1 Where to Buy
-
OEM parts: Roland Cloud (Japan), Syntaur (US), or direct from manufacturers (ID required).
-
Third-party: eBay/Alibaba ($8–$25) – verify thickness (0.4–0.7mm).
5.2 Installation Tips
-
Align guide pins with PCB holes .
-
Avoid stretching silicone – use tweezers for precision.
6. Preventive Maintenance: Extend Your Keypad’s Life
Caption: Essential items: air duster, IPA, microfiber cloth.
6.1 Humidity Control
-
Ideal range: 40–50% RH. Use rechargeable silica packs ([Amazon Affiliate Link]).
-
Never store synths in basements/attics.
6.2 Monthly Cleaning Routine
-
Vacuum key gaps (prevents sugar/grime buildup).
-
Wipe with IPA-dampened cloth.
-
Avoid: WD-40 – degrades silicone!
7. Advanced Upgrades: Beyond Rubber Keypads

Caption: Optical (top) vs. traditional rubber (bottom) keybeds.
7.1 Optical Key Detection
-
How: Infrared beam interruption (zero physical wear).
-
Examples: Waldorf Quantum, Arturia KeyLab 88 MKII.
7.2 Magnetic Hall Effect Sensors
-
Pros: 0.01mm precision, adjustable sensitivity.
-
Cons: $200+ upgrade cost.

 English
 Deutsch
 español


 86-592-5659128 (to8016)
 anna@xmydx.com
 sallyliao1985
 +86-13606037597